> For the complete documentation index, see [llms.txt](https://docs.connectomesystem.com/llms.txt). Markdown versions of documentation pages are available by appending `.md` to page URLs; this page is available as [Markdown](https://docs.connectomesystem.com/getting-started/quick-start.md).
# Quick Start
#### 1. Create a workspace
A workspace is like a regular office in your company, which could consist of a sales, a marketing, a finance, and an operation department. You will get prompted for creating a new workspace when you first sign up, or you can create a new one by clicking on your existing workspace name on the top-left side of your screen, which shows a dropdown and then you can click Create New. One account can have as many workspaces as you need. Maybe your enterprise has multiple business units, for instance, an enterprise may have a F\&B business, a logistic business and a digital business.
#### 2. Connect a data source
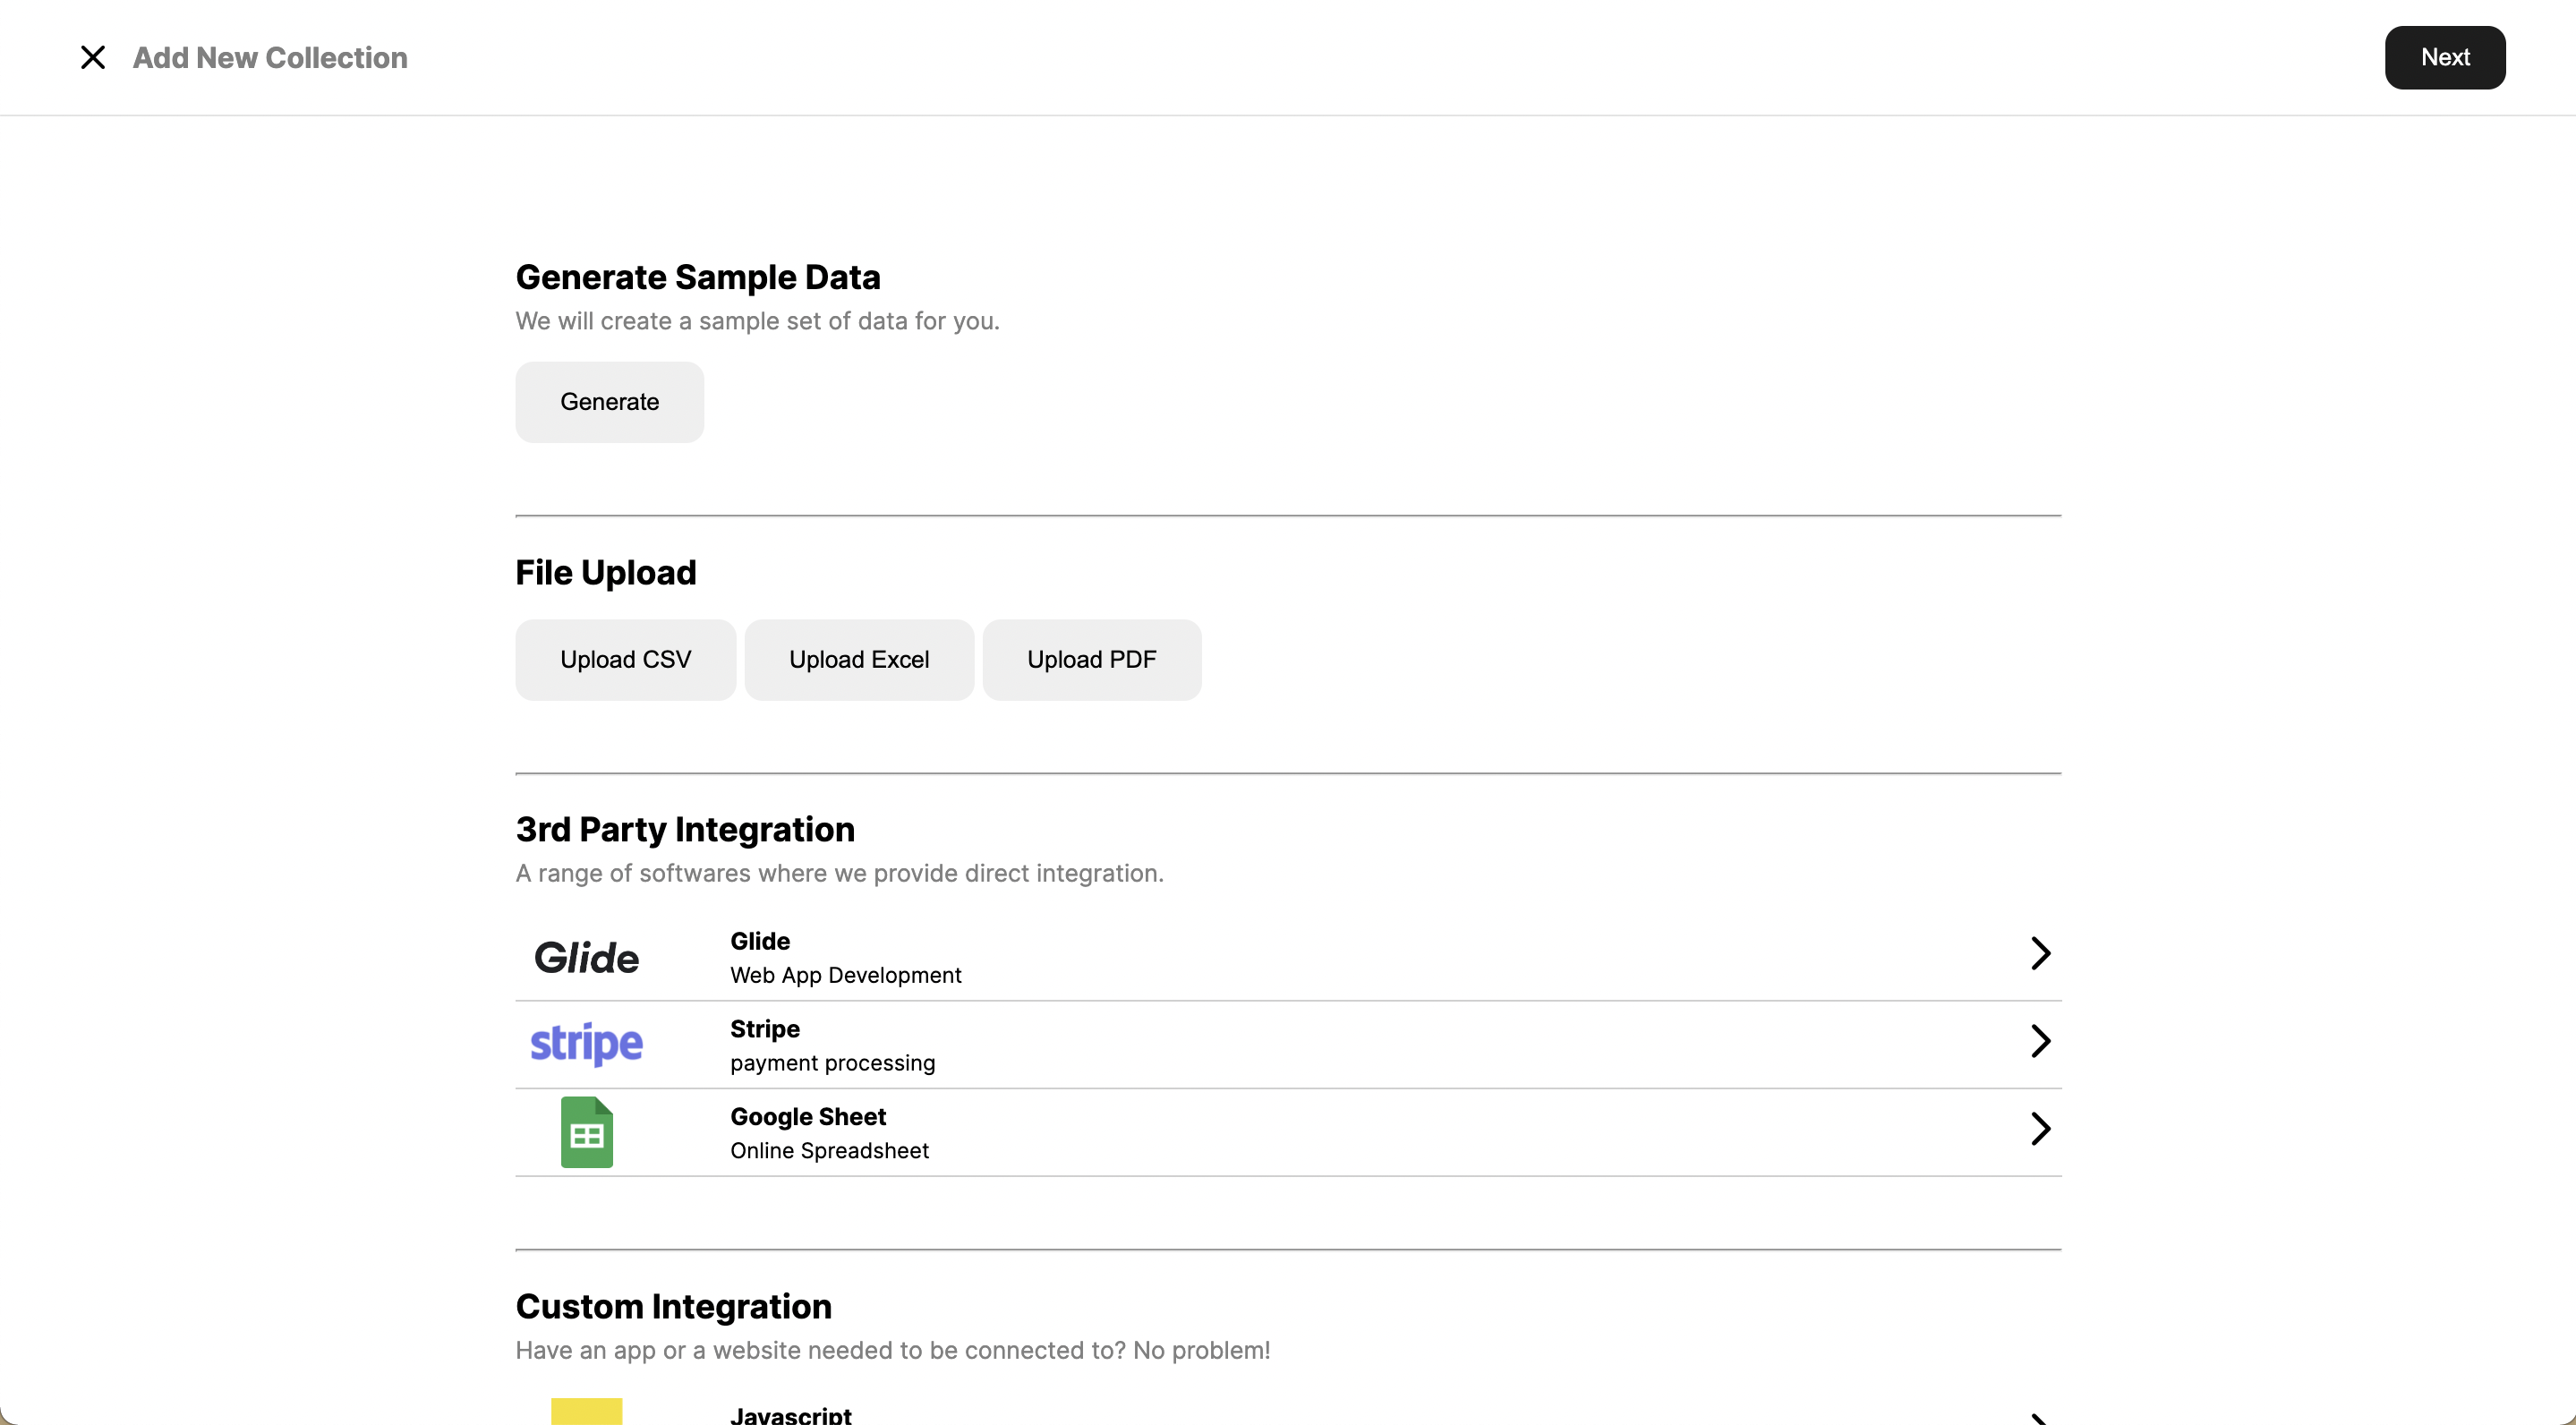
Once you set up your workspace, you can connect data sources to your workspace. Data source is where our data platform can draw data from. It can be a database (e.g. Microsoft SQL Server, Google Sheet), an existing IT system in your business (e.g. Oracle's netsuite, POS system), or simply upload an existing data file you have (e.g. Excel spreadsheet, CSV). Once we connect to your data source, the data will be imported to the data platform. The imported data will form a Collection, which could be understood as a "dataset".
#### 3. View your data
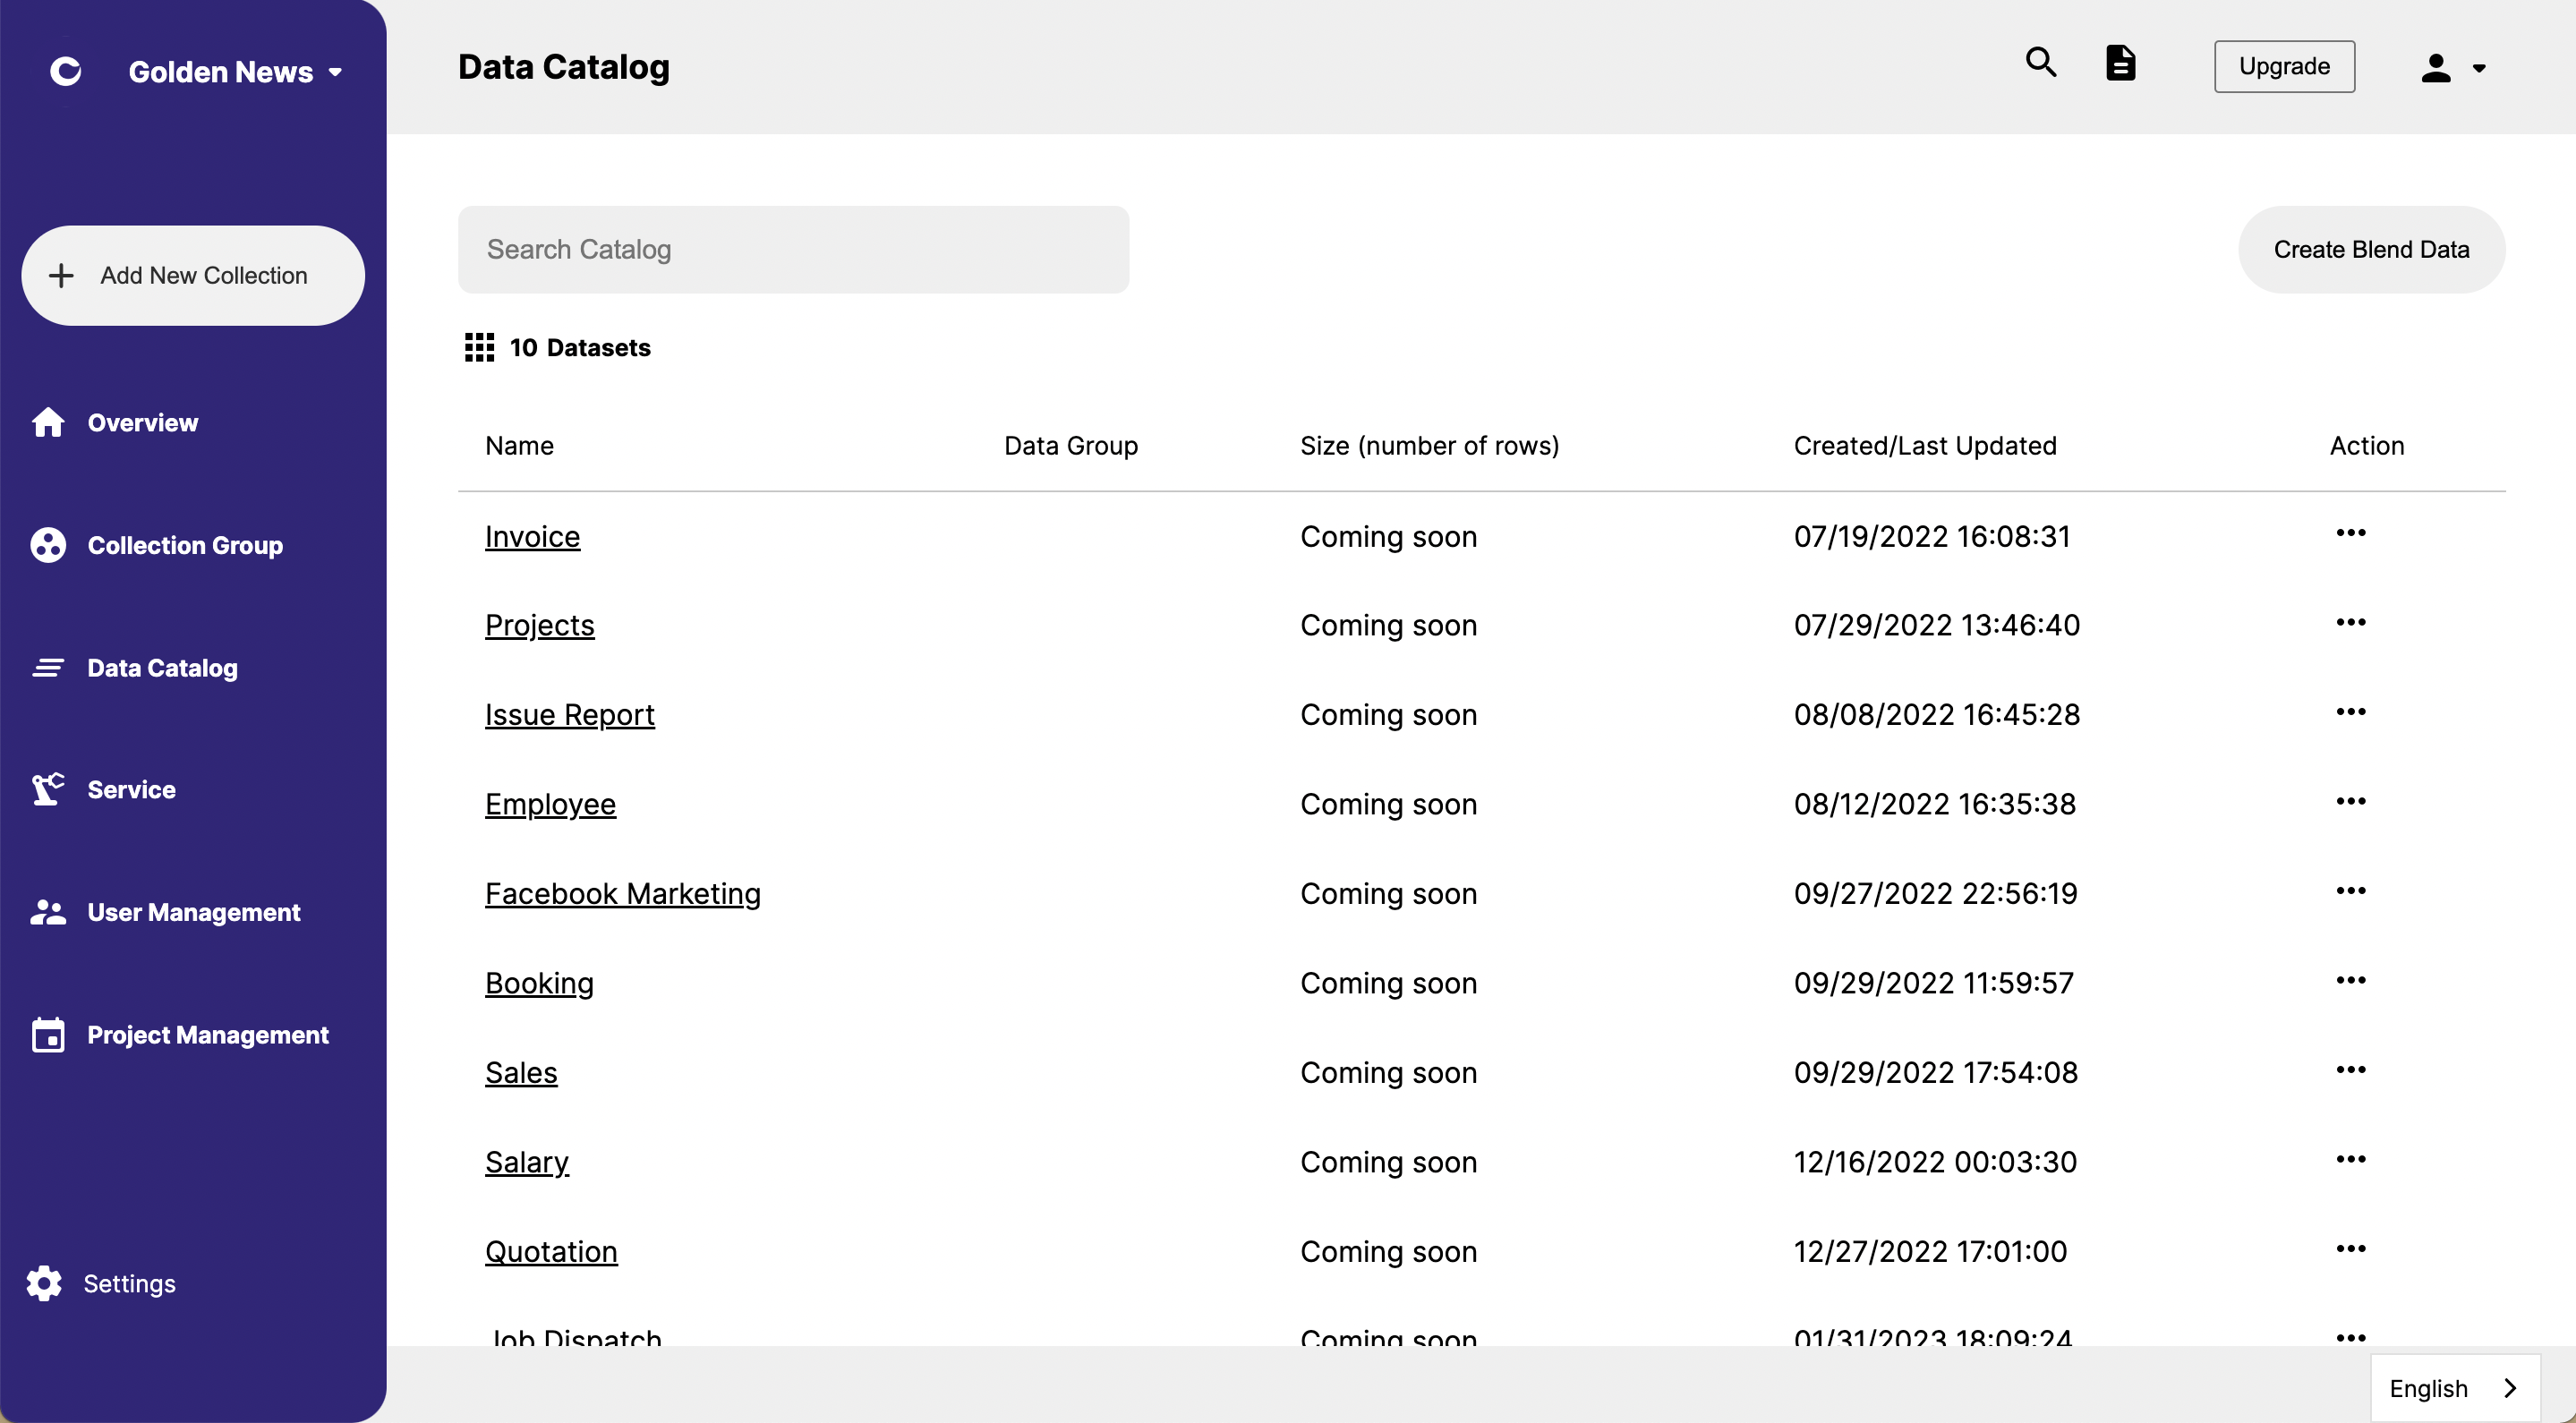
Once you connect with different data sources, you can find your collection in our data catalog, which is a centralized access point to all your data. By centralizing the access, we simplify the way you manage your data, improved overall security and simplify the use of data within your organization.
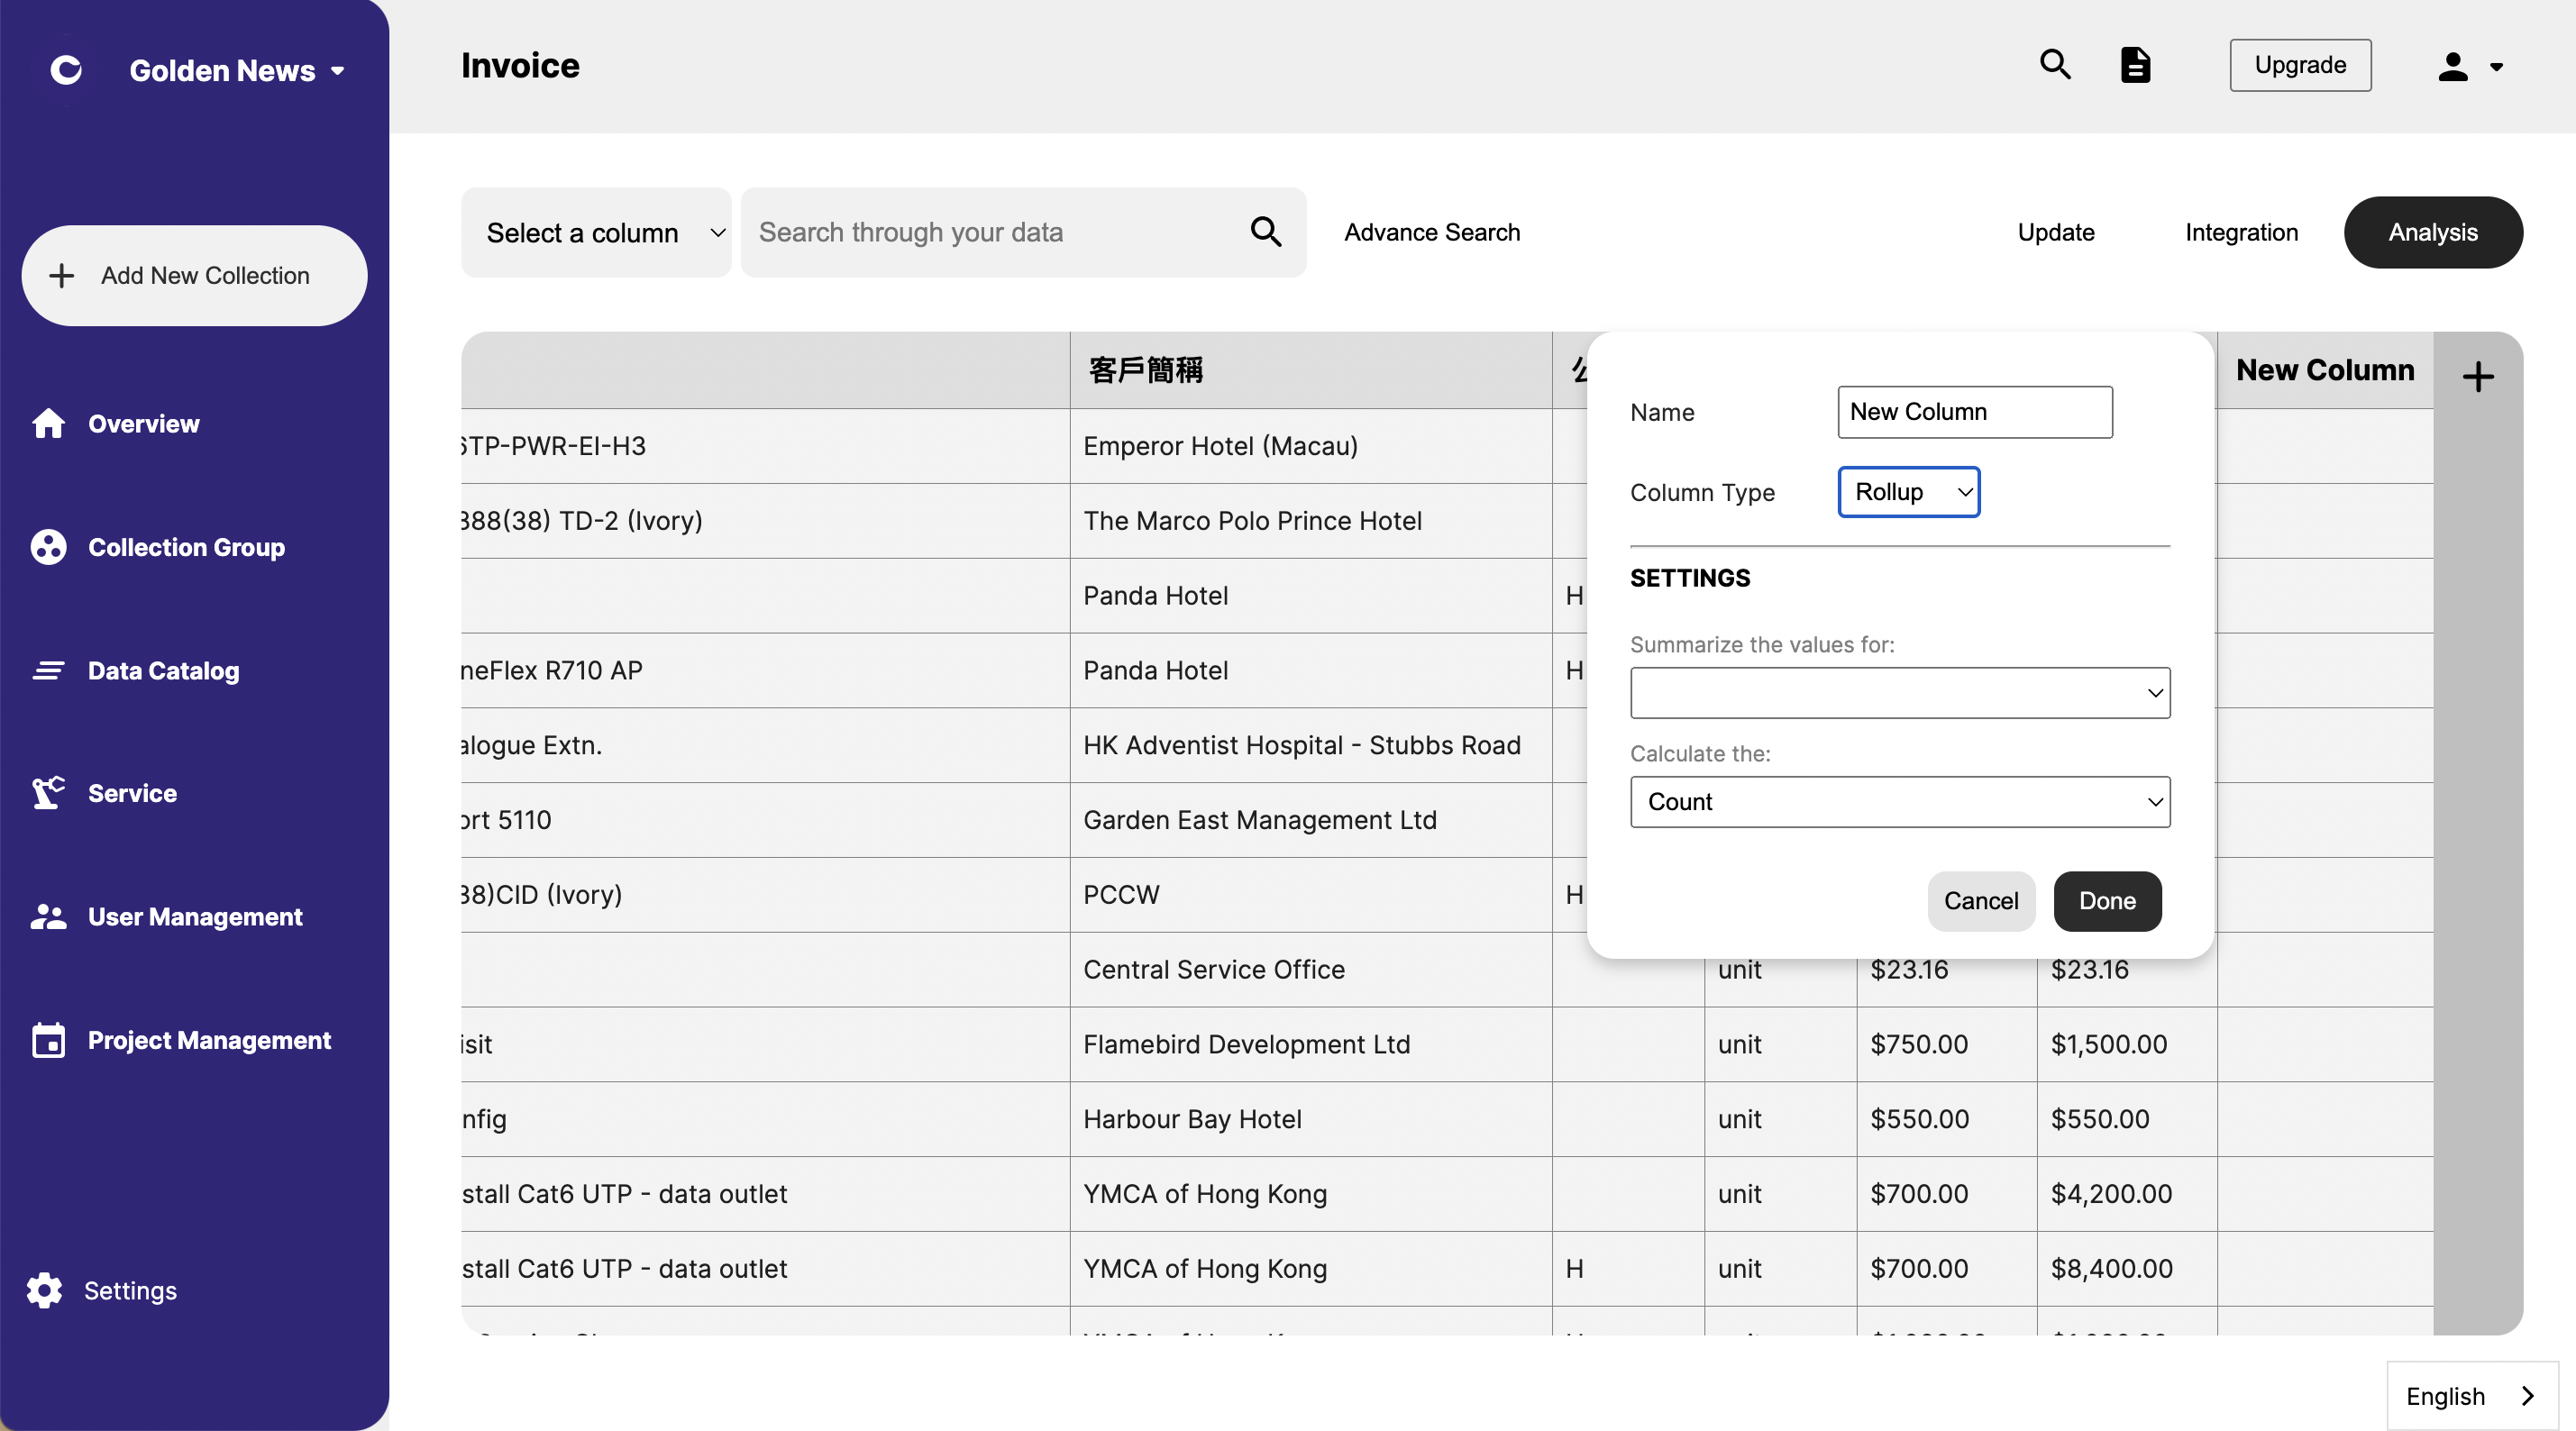
By clicking one of the collections, you can get access to the collection page. We have build tools that help you get ready with your data, for example, we help you better format your date column so you can filter by date, or we help you merge two datasets to create new dataset, for example if you have a collection storing member data and another collection storing purchase data, we can merge two dataset to create a purchase list detailing the member detail for each transaction.
You can create new columns by clicking on the plus button on the right of the table at one of your collection page.
#### 4. Make use of your data now
There are so many ways you can make use of your data, create visualization to discover insight, create automation to streamline operation, develop new apps to create new products/services. You can achieve any of these by using one of many integrations we have at the data platform.
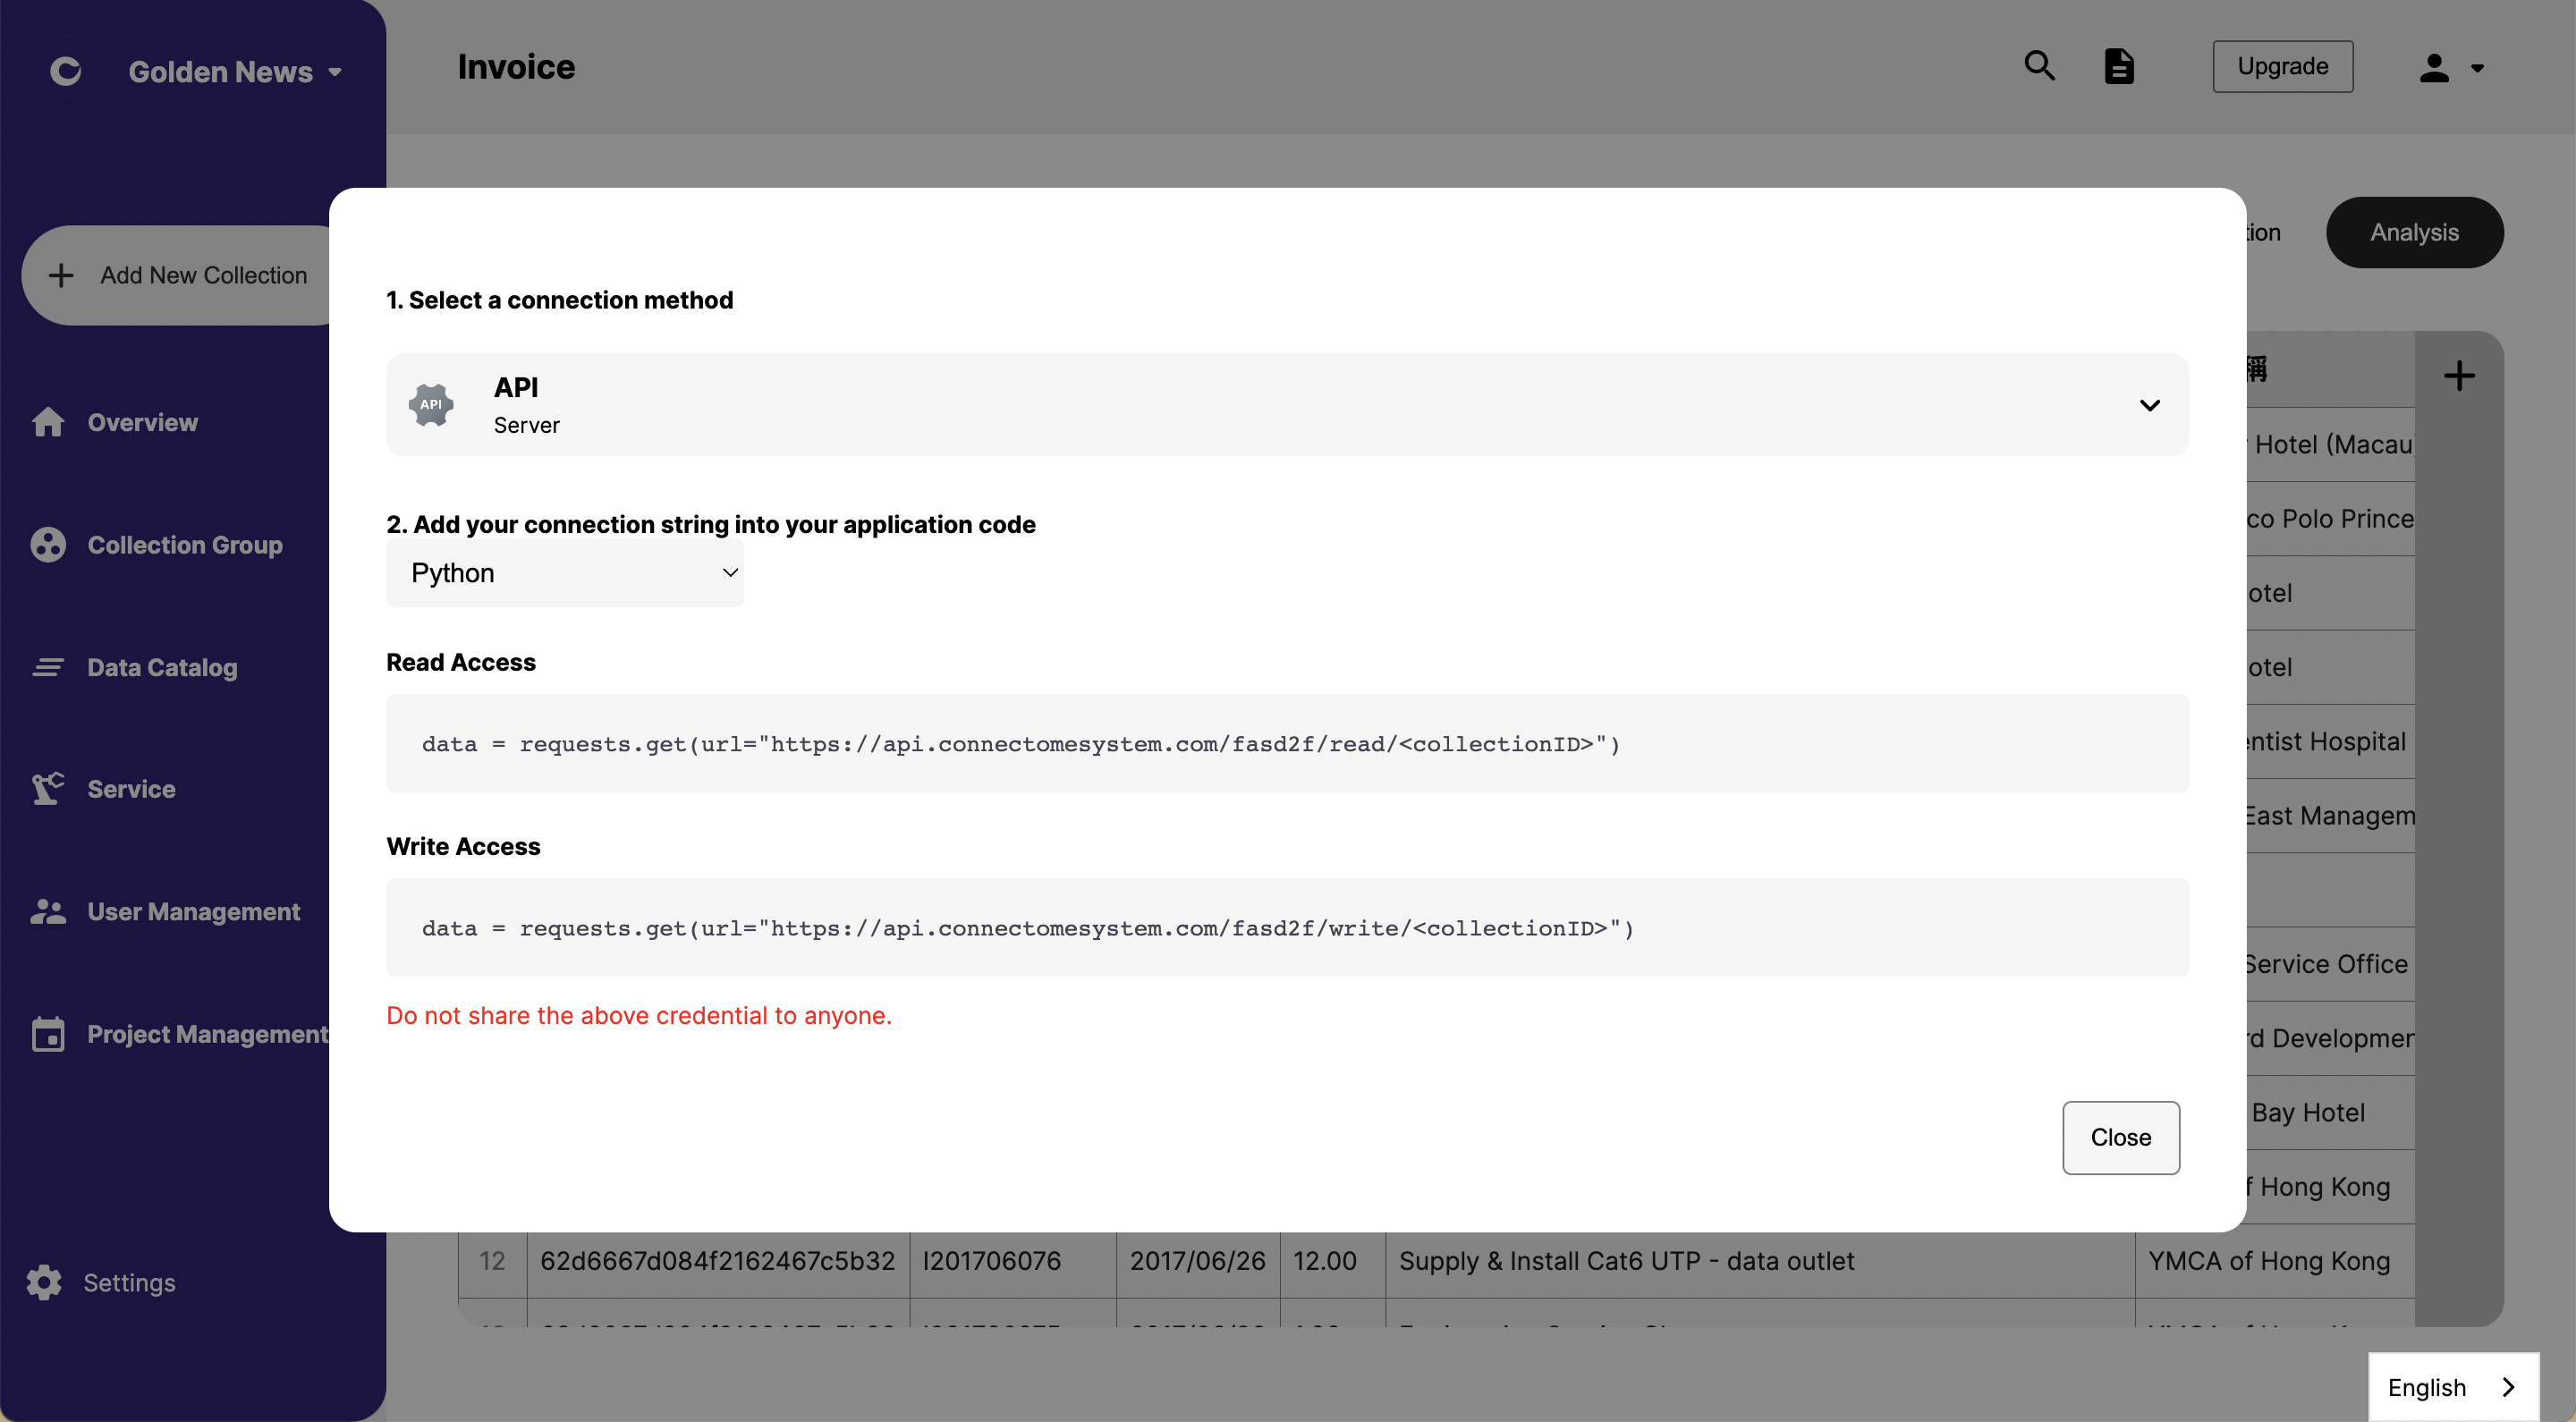
You can access the integration panel by clicking the Integration button right above the data table in your collection page.